· 10 min read
Unleash Generative AI in Your Flutter App with Gemini
So, how do you get started with AI? Whether you’re a coder, designer, storyteller, or community builder, there’s a place for your voice. That's where Google's Gemini comes in, offering a powerful starting point to help us create solutions that reflect both human ingenuity and human values.
Let’s Build with AI: Supercharge Your Flutter App with Gemini
Carol Bolger
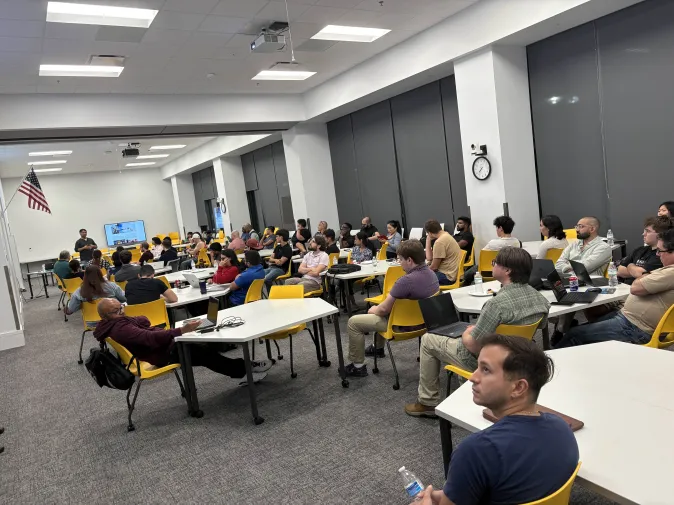
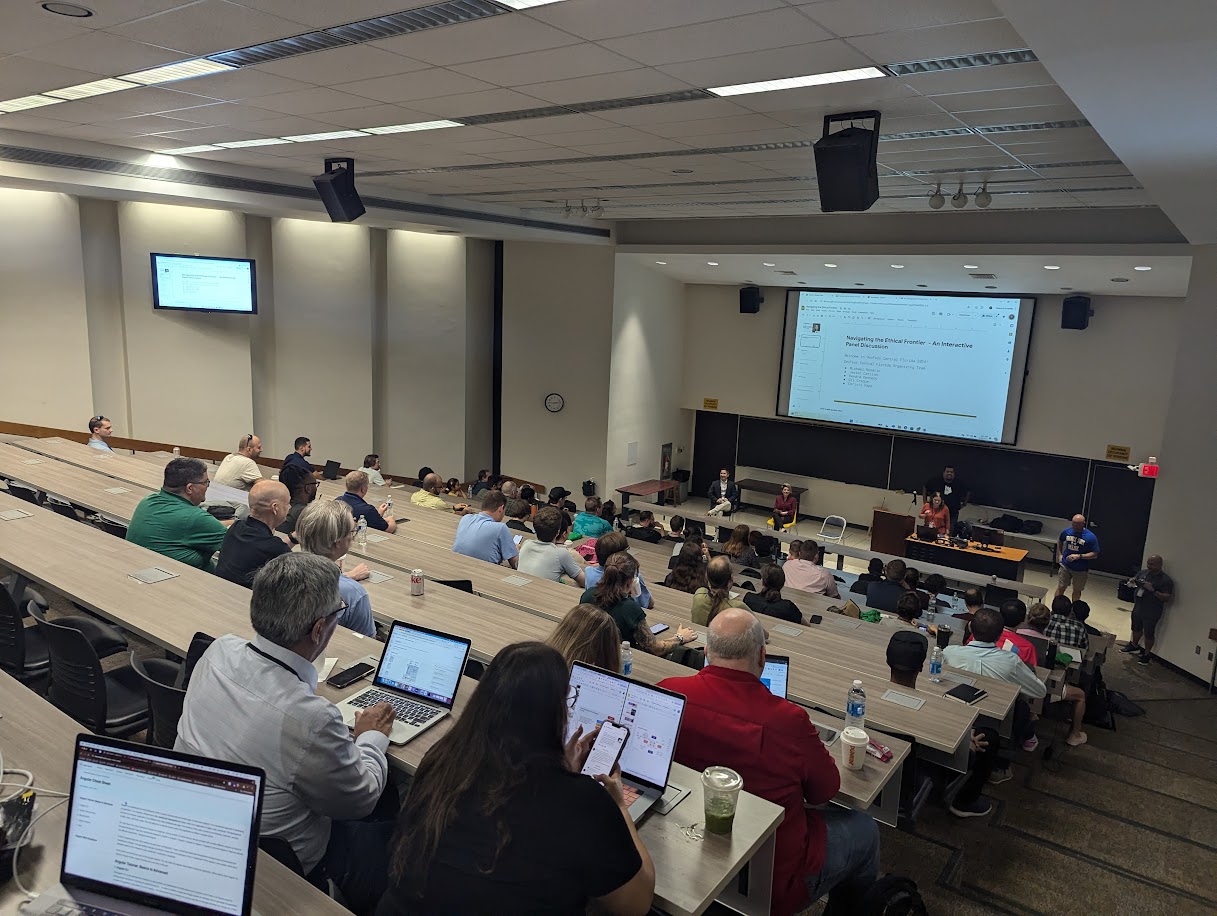
AI is transforming the world, so this year at DevFest GemJam, we are embracing “Build with AI”. At this event, we explore how to use AI responsibly and ethically, ensuring our innovations are guided by inclusivity and care.
So, how do you get started with AI? Whether you’re a coder, designer, storyteller, or community builder, there’s a place for your voice. That’s where Google’s Gemini comes in, offering a powerful starting point to help us create solutions that reflect both human ingenuity and human values.
What is Gemini?
Think of Gemini as your creative partner in code. It’s a powerful and versatile family of AI models from Google that can understand and work with a huge range of information—not just text, but also images and code. This makes it an incredibly powerful tool for a hackathon, allowing you to build features that were once complex and out of reach.
Why Gemini for Your Flutter Hackathon App?
Integrating a powerful AI into your Flutter app might sound complicated, but Gemini is designed to be accessible. Here’s why it’s a perfect fit for your next project: Go Beyond Text (Multimodality): Don’t just process text; understand it. Gemini allows you to build apps that can describe images a user uploads, generate code snippets, or even create a story from a picture. This opens up a whole new world of creative possibilities for your hackathon project.
Get Started in Minutes: With Google AI Studio, you can get a free API key and start experimenting with Gemini’s capabilities right in your browser. This makes it incredibly easy to prototype ideas before writing a single line of Dart.
Create the “Wow” Factor: Imagine building an app that doesn’t just look good but thinks. Integrating Gemini can give your project that “wow” factor that will impress the judges, whether it’s through an intelligent chatbot, a smart content summarizer, or a creative text generator.
In this guide, we’ll walk you through every step of integrating the Gemini API into a Flutter app. We’ll keep it simple and practical by building a “Hackathon Idea Generator”—a fun tool that will get you comfortable with the core concepts you need to bring your own innovative AI-powered ideas to life. Let’s get building!
Step 1: Setting Up Your Flutter Project
First things first, let’s get our Flutter project ready for AI magic. This part is all about laying the groundwork: creating the app, adding the right packages, and making sure we handle our secret API key safely.
Create a New Flutter App Open your terminal and run the classic command to get a fresh project started. We’ll call ours gemini_hackathon_app. flutter create gemini_hackathon_app cd gemini_hackathon_app
Add Your Dependencies To talk to the Gemini API and manage our API key securely, we need a couple of packages. The google_generative_ai package makes calling the API super simple, and flutter_dotenv is the best practice for keeping your API key out of your source code. Open your pubspec.yaml file and add these lines under dependencies, check for the latest versions!:
 flutter:
   sdk: flutter

 cupertino_icons: ^1.0.8
 google_generative_ai: ^0.4.7
 flutter_markdown: ^0.7.7+1
 flutter_riverpod: ^3.0.0
 flutter_dotenv: ^6.0.0
After saving the file, run flutter pub get in your terminal to install them.
Buy a Ticket!- Secure Your API Key (Super Important!) Your API key is a secret! Never, ever commit it directly into your code where others can see it. Using an environment variable is the way to go. Create a .env file in the root of your project (the same level as pubspec.yaml). Add your key to this file: API_KEY=YOUR_GEMINI_API_KEY_HERE
Add the .env file to your .gitignore to ensure it’s never checked into version control.
Finally, declare the .env file as an asset in your pubspec.yaml so your app can access it:
  uses-material-design: true
  assets:
    - .env
First, we need to set up your main application file to use Riverpod. You need to wrap the entire application in a ProviderScope.
Replace the content of your lib/main.dart file with this code:
import 'package:flutter_riverpod/flutter_riverpod.dart';
import 'home_screen.dart'; // We will create this file next

void main() {
  runApp(
    // Add ProviderScope to the root of the app for Riverpod to work
    const ProviderScope(
      child: MyApp(),
    ),
  );
}

class MyApp extends StatelessWidget {
  const MyApp({super.key});

  @override
  Widget build(BuildContext context) {
    return MaterialApp(
      title: 'Hackathon Idea Generator',
      theme: ThemeData(
        colorScheme: ColorScheme.fromSeed(seedColor: Colors.deepPurple),
        useMaterial3: true,
      ),
      home: const HomeScreen(), // Set the HomeScreen as the entry point
    );
  }
}
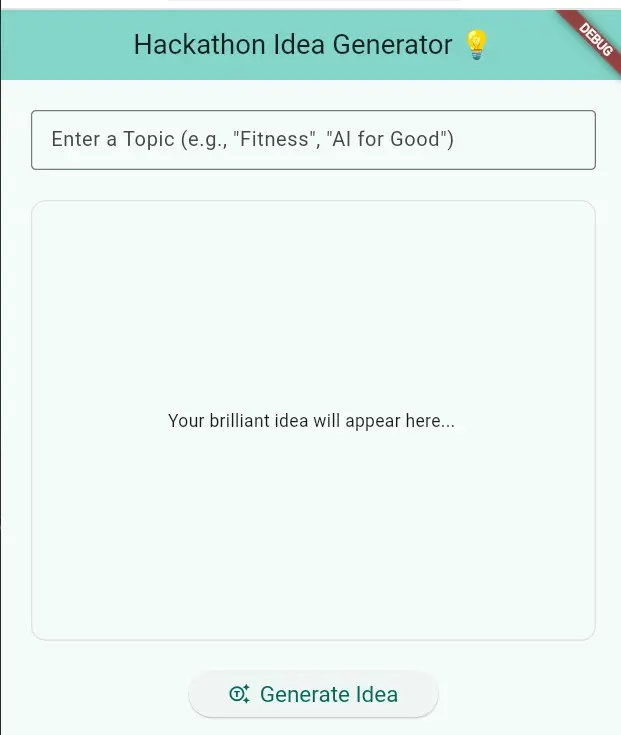
Create the Home Screen
Now, let’s create the actual UI for the app. Create a new file named home_screen.dart inside your lib folder. Paste the following code into lib/home_screen.dart:
import 'package.flutter_riverpod/flutter_riverpod.dart';

// Use a ConsumerWidget to listen to providers from Riverpod
class HomeScreen extends ConsumerWidget {
  const HomeScreen({super.key});

  @override
  Widget build(BuildContext context, WidgetRef ref) {
    return Scaffold(
      // 1. The top app bar
      appBar: AppBar(
        title: const Text('Hackathon Idea Generator 💡'),
        centerTitle: true,
        backgroundColor: Theme.of(context).colorScheme.inversePrimary,
      ),
      // 2. The main content area
      body: Center(
        child: Padding(
          padding: const EdgeInsets.all(24.0),
          child: Column(
            mainAxisAlignment: MainAxisAlignment.center,
            children: <Widget>[
              // This container will display the generated idea
              Expanded(
                child: Container(
                  padding: const EdgeInsets.all(16.0),
                  decoration: BoxDecoration(
                    border: Border.all(color: Colors.grey.shade300),
                    borderRadius: BorderRadius.circular(12.0),
                  ),
                  child: const SingleChildScrollView(
                    child: Text(
                      'Your brilliant idea will appear here...',
                      textAlign: TextAlign.center,
                      style: TextStyle(fontSize: 18.0),
                    ),
                  ),
                ),
              ),
              const SizedBox(height: 24.0),
              // This button will trigger the idea generation
              ElevatedButton.icon(
                onPressed: () {
                  // TODO: Call the Riverpod provider to generate an idea
                },
                icon: const Icon(Icons.generating_tokens_outlined),
                label: const Text('Generate Idea'),
                style: ElevatedButton.styleFrom(
                  padding: const EdgeInsets.symmetric(
                    horizontal: 32.0,
                    vertical: 16.0,
                  ),
                  textStyle: const TextStyle(fontSize: 18),
                ),
              ),
            ],
          ),
        ),
      ),
    );
  }
}
UI Breakdown
Here’s a quick look at what we’ve built:
- ConsumerStatefulWidget: A specialized StatefulWidget provided by the Riverpod.
- Scaffold: This provides the basic app layout structure (app bar, body).
- AppBar: A simple title bar for our app.
- body: The main content is a Column containing three primary widgets:
- An Expanded Container that serves as a display box for the generated text.
- An ElevatedButton at the bottom that the user will press to get a new idea.
- A TextFormField for user input.
If you run the app now, you should see this basic interface.
Create the Generative AI Service
This class will contain all the logic for talking to the API. Create a new file in your lib folder called generative_ai_service.dart.
import 'package:flutter_dotenv/flutter_dotenv.dart';
import 'package:google_generative_ai/google_generative_ai.dart';


class GenerativeAiService {
  // Read the API key from the environment variable
  final String apiKey = const String.fromEnvironment('API_KEY');

  Future<String?> generateIdea() async {
    if (apiKey.isEmpty) {
      throw 'API_KEY environment variable is not set.';
    }

    // Initialize the model
    final model = GenerativeModel(
      // We use gemini-2.5-flash here. It's fast and powerful.
      // You can experiment with other models like 'gemma-2b-it'.
      model: 'gemini-2.5-flash',
      apiKey: apiKey,
    );

    // This is our prompt to the model.
    const prompt =
        'Generate a novel and interesting hackathon project idea related to the topic of "$topic". '
'If the topic is empty, generate an idea on any topic. '
'Provide a short, catchy name for the project and a 2-3 sentence description of what it does. '
'Format the response as: **Project Name:** [Name] \n\n **Description:** [Description]';


    final content = [Content.text(prompt)];

    try {
      final response = await model.generateContent(content);
      return response.text;
    } catch (e) {
      print('Error generating content: $e');
      return 'Failed to generate idea. Please try again.';
    }
  }
}
Code Breakdown:
String.fromEnvironment(‘API_KEY’): This is how we securely read the API key that you will provide when you run the app.
GenerativeModel(…): We initialize the generative model, specifying which model to use (gemini-1.5-flash-latest is a great starting point) and passing our API key.
prompt: This is the crucial instruction we send to the model. A well-crafted prompt gives you much better results.
model.generateContent(): This is the asynchronous network call that sends our prompt to the model and waits for a response.
Step 2: Create the Riverpod Provider
Now, let’s create the providers that will use this service and manage our app’s state. Create a new file in your lib folder called idea_provider.dart.
import 'package:flutter_riverpod/flutter_riverpod.dart';
import 'generative_ai_service.dart';

// 1. A simple provider for our service class
final generativeAiServiceProvider = Provider<GenerativeAiService>((ref) {
  return GenerativeAiService();
});

// 2. An AsyncNotifierProvider to manage the state of the generated idea
final ideaProvider = AsyncNotifierProvider<IdeaNotifier, String>(() {
  return IdeaNotifier();
});


class IdeaNotifier extends AsyncNotifier<String> {
  // The initial state of our provider
  @override
  String build() {
    return 'Your brilliant idea will appear here...';
  }

  // A method to trigger the idea generation
  Future<void> generateNewIdea() async {
    // Set the state to loading
    state = const AsyncValue.loading();

    // Get the AI service from our simple provider
    final aiService = ref.read(generativeAiServiceProvider);

    // Update the state with the result of the API call
    state = await AsyncValue.guard(() async {
      final idea = await aiService.generateIdea();
      return idea ?? 'No idea generated.';
    });
  }
}
Code Breakdown:
generativeAiServiceProvider: A simple Provider that creates an instance of our GenerativeAiService. This lets us easily access or replace the service anywhere in our app.
ideaProvider: This is the main provider our UI will interact with. We use AsyncNotifierProvider because it’s perfect for managing asynchronous state that can be re-fetched (like getting a new idea).
IdeaNotifier:
- build(): Sets the initial placeholder text.
- generateNewIdea(): This is the public method our UI will call. It sets the state to loading, calls our service to get an idea, and then updates the state to either the data (the new idea) or an error. The AsyncValue.guard automatically handles try/catch for us. We’re all set on the logic side! The final step is to connect these providers to the UI we built earlier. Replace the entire content of lib/home_screen.dart with the code below.
import 'package:flutter/material.dart';
import 'package:flutter_markdown/flutter_markdown.dart';
import 'package:flutter_riverpod/flutter_riverpod.dart';
import 'idea_provider.dart';

// Convert to a ConsumerStatefulWidget
class HomeScreen extends ConsumerStatefulWidget {
  const HomeScreen({super.key});

  @override
  ConsumerState<HomeScreen> createState() => _HomeScreenState();
}

class _HomeScreenState extends ConsumerState<HomeScreen> {
  // Create a controller to get text from the text field
  late final TextEditingController _topicController;

  @override
  void initState() {
    super.initState();
    _topicController = TextEditingController();
  }

  @override
  void dispose() {
    _topicController.dispose();
    super.dispose();
  }

  @override
  Widget build(BuildContext context) {
    final ideaState = ref.watch(ideaProvider);

    return Scaffold(
      appBar: AppBar(
        title: const Text('Hackathon Idea Generator 💡'),
        centerTitle: true,
        backgroundColor: Theme.of(context).colorScheme.inversePrimary,
      ),
      body: Center(
        child: Padding(
          padding: const EdgeInsets.all(24.0),
          child: Column(
            mainAxisAlignment: MainAxisAlignment.center,
            children: <Widget>[
              // NEW: Added a text field for the topic
              TextField(
                controller: _topicController,
                decoration: const InputDecoration(
                  labelText: 'Enter a Topic (e.g., "Fitness", "AI")',
                  border: OutlineInputBorder(),
                ),
              ),
              const SizedBox(height: 24.0),
              Expanded(
                child: Container(
                  width: double.infinity,
                  padding: const EdgeInsets.all(16.0),
                  decoration: BoxDecoration(
                    border: Border.all(color: Colors.grey.shade300),
                    borderRadius: BorderRadius.circular(12.0),
                  ),
                  child: Center(
                    child: ideaState.when(
                      data: (idea) => MarkdownBody(data: idea, selectable: true),
                      loading: () => const CircularProgressIndicator(),
                      error: (err, stack) => Text('Error: $err'),
                    ),
                  ),
                ),
              ),
              const SizedBox(height: 24.0),
              ElevatedButton.icon(
                // UPDATED: Pass the topic to the provider
                onPressed: () {
                  ref.read(ideaProvider.notifier).generateNewIdea(
                        topic: _topicController.text,
                      );
                },
                icon: const Icon(Icons.generating_tokens_outlined),
                label: const Text('Generate Idea'),
                style: ElevatedButton.styleFrom(
                  padding: const EdgeInsets.symmetric(
                    horizontal: 32.0,
                    vertical: 16.0,
                  ),
                  textStyle: const TextStyle(fontSize: 18),
                ),
              ),
            ],
          ),
        ),
      ),
    );
  }
}
Code Breakdown
ref.watch(ideaProvider): This line is the key to making the UI reactive. It listens to our ideaProvider, and whenever the state changes (from loading to data, for example), it triggers a rebuild of this widget.
ideaState.when(…): This is the best part of using AsyncValue from Riverpod. It forces you to handle all possible states:
- data: (idea): If the data was fetched successfully, we display it. We use the MarkdownBody widget here to properly render any formatting (like bold text) from the AI’s response.
- loading: (): While the app is waiting for a response from the API, it shows a CircularProgressIndicator.
- error: (err, stack): If something goes wrong, it displays an error message.
- ref.read(ideaProvider.notifier).generateNewIdea(): In the onPressed callback, we call the generateNewIdea method we created. We use ref.read here because we just want to call the function once on button press, not listen for changes.
And that’s it! You now have a fully functional Flutter app that uses the Gemini API to generate creative hackathon ideas. Happy hacking!
Let’s keep the conversation going connect with me on LinkedIn Carol Bolger.